
Once in a while, you might come across a data set in excel with blank spaces and filled spaces. This is a common challenge for Excel users. This tutorial will show you how to fix such a problem quickly.
Method 1- Fill Blank Cells with Go To Special + Formula
1. Select the Blank Cells
First, go to special and select the blank cells you want to fill. Choose a simple formula that you will use to fill the blank spaces.

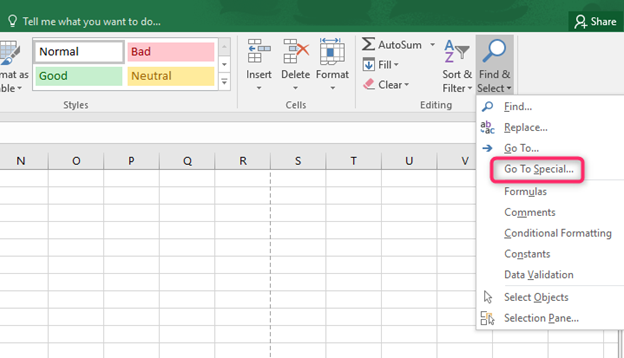
2. Click the 'Home' tab.
Go to the editing group in the Home tab and click on 'Find & Select.' A drop-down menu will appear. Tap on the 'Go To' option to open a dialogue box in the drop-down menu.
3. Click on the Special button.
After clicking on the special button, a Go-To Special dialog box opens. Click on blanks to select only the blank cells.
4. Click on OK
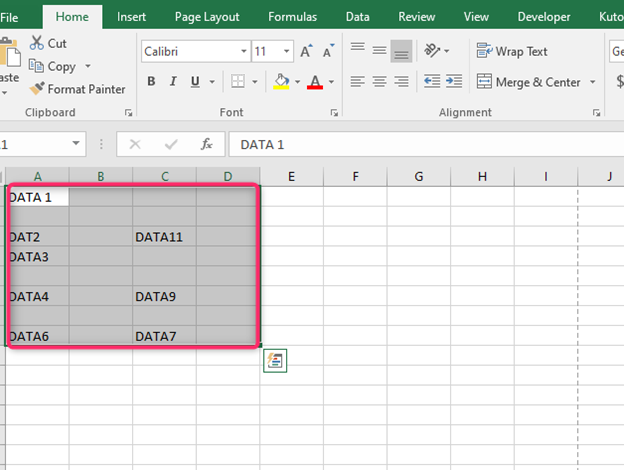
Clicking okay automatically selects all the blank cells in the given Excel sheet. Enter the formula in the cell that looks lighter or more unique than the rest. Press the equal key and the arrow key, then click on enter to insert all the blank cells.
Method 2 – Fill Blank Cells with a VBA Code
1. Select the Blank Cells
Start by selecting all the blank cells that you want to fill.
2. Click on the 'Developer' tab.
In the tab that opens, click the Visual Basic, which opens the Visual Basic Editor. Alternatively, use the ALT + F11 shortcut to open the Visual Basic Icon.

3. Click on Project Explorer
The project explorer is on the left of the Visual Basic Editor. The icon may be unnoticeable on some devices. Click 'View' to see the project explorer if you cannot find it.

4. Locate your Excel workbook
Usually, project explorer will show you all the open workbooks; select the one you want to work on. Once done, right-click on any object in the Excel sheet to insert modules. Click on 'Insert' then go to 'Module.'
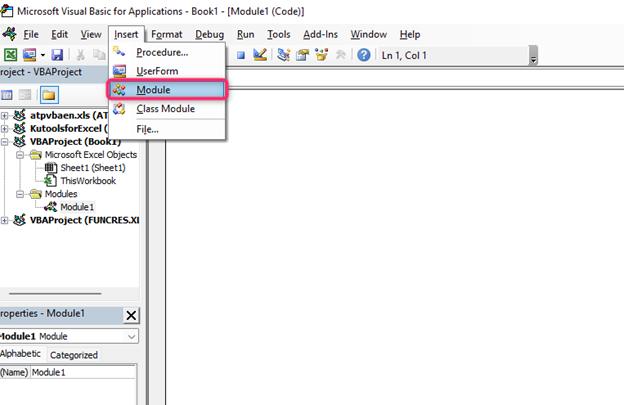
5. Double-click on Module
The module will open the code window for the worksheet. Copy-paste the VBA code into the window and run it by clicking the green button. Alternatively, you can automatically use the 'keyboard shortcut F5' to fill the blanks.
Method 3 – Fill Blank Cells with Power Query
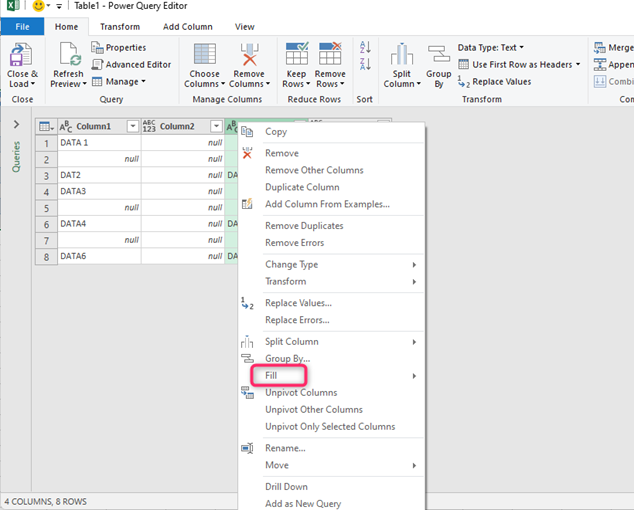
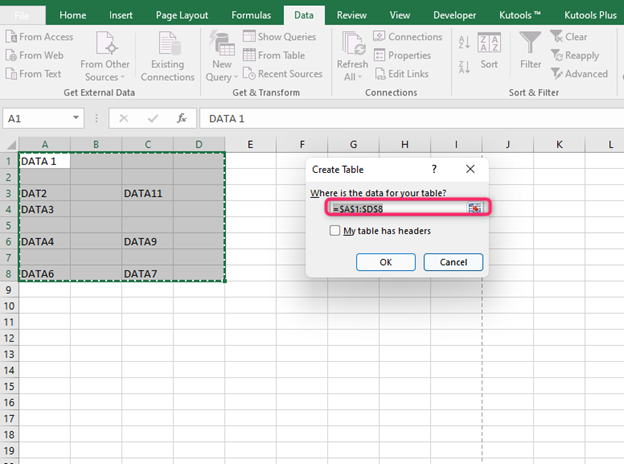
1. Select the Blank Cells
Choose all the 'blank cells' in your data set.

2. Click the 'Data' tab.
Go to the Get & Transform Data group in the open menu and select 'From Sheet.' The steps will automatically open the Power Query editor.

3. Select the columns
Hold the Control key and click on column headers in the Power Query editor to select the required columns.
4. Right-click on the Selected Headers
After right-clicking, click on the 'Fill' button and then the 'Down' to automatically fill all the blank cells. Once done, go to the File tab and click 'Close & Load' to insert a new worksheet instantly.