
Analysis of huge amounts of data is very crucial. Humans have long been in the process of devising newer ways that are more efficient to manipulate data. It all started with manual spreadsheets in the early years before the total availability of computers everywhere. Spreadsheets are therefore designed to specifically offer data manipulations and storage of numeric data. It can be used by small organizations or even an individual who may be doing some research.
Its ability to perform statistical operations on numeric data has proven to be of great help. Rows containing numeric data can allow the use of functions and formulas to analyze data, for example, to get mean, totals and deviations. Electronic spreadsheets have brought along various advantages. They can enhance the accuracy of data manipulation, offer a larger worksheet for data entry of more than approximately 250 rows and 250 columns, enable formatting of worksheets and automatically adjust the results of a given formula or a function when certain data values in cells are changed.
Today, this article is going to explain how to remove duplicates from rows using a given column.
Steps on how to remove duplicate rows based on one column in excel.
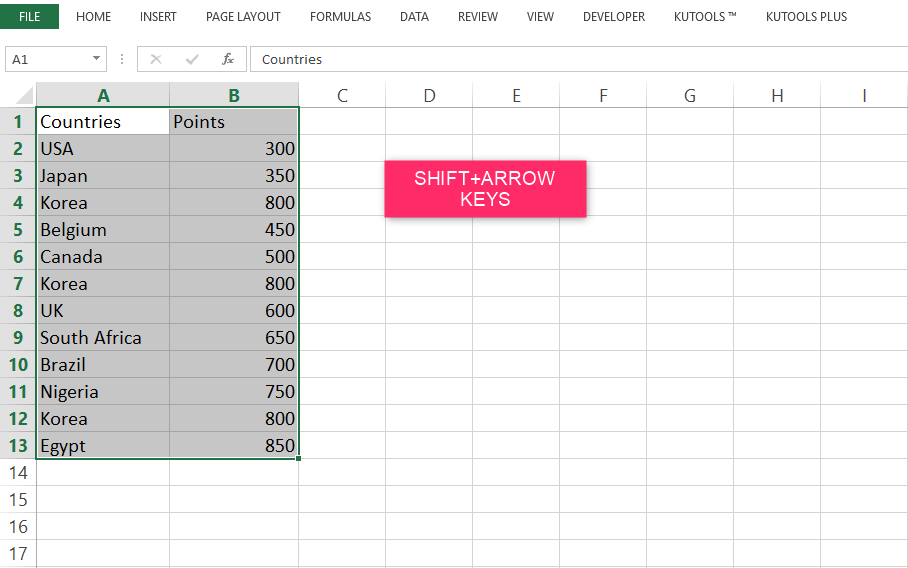
Step 1: Select the range of cells that you want to remove duplicates from. A range is a "rectangular" block of cells containing data to be manipulated.
Just like in word, in most cases, the user must select or highlight the cells that he or she wants to manipulate. For Excel, the same operation of selecting text must be done.
To highlight a range of cells simply press shift at the cell where you want to begin your cell selection and then continuously press the arrow keys to control the size of the range. The range of cells is thus that block on which manipulation of data is to be carried out.
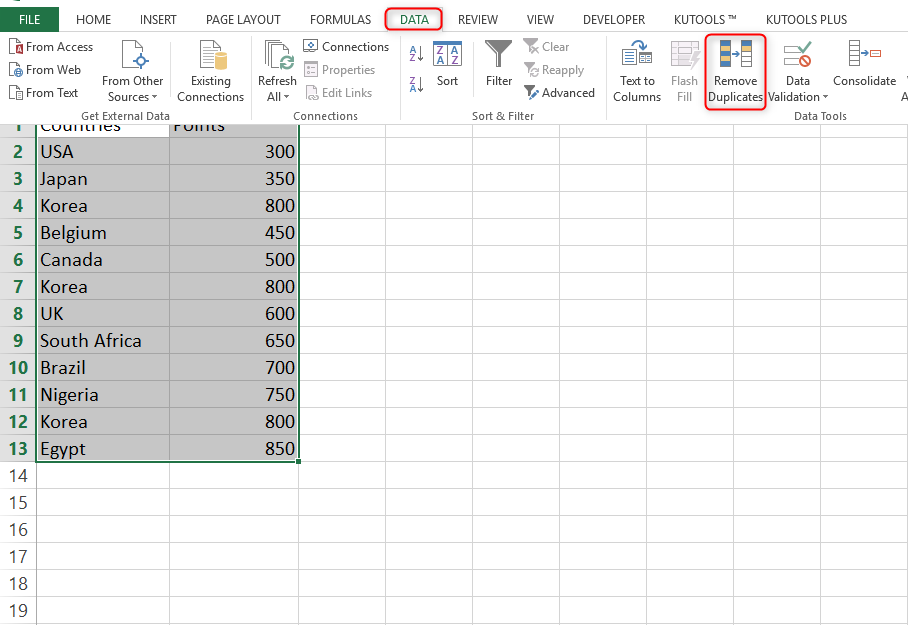
Step 2: After highlighting the block of cells to manipulate, select the "Data "tab on the MS Excel ribbon. Navigate or look for the "Data Tools" group commonly located at the rightmost part of the ribbon. Then select the "Remove Duplicates" option.
Its icon is represented by two columns that have an arrow between them. Press or click on the "Remove Duplicates" command button on the "Data Tools" group. A group in the ribbon is usually a collection of commands that are almost related and have a common title. Clicking on the "remove duplicates" options will give one an opportunity to pick the column or columns to be checked for duplicates.
Step 3: A dialog with the title Remove Duplicates will appear. Choose the checkbox that lists the column you intend to use to check for duplicates.

You choose to check for duplicates in all columns by having the "Select All" button option but for our case, since we are removing duplicates based on one single column we just need to choose the checkbox for the specific column that we need to use.
Step 4: Click the "OK" button after checking the column of your choice from the checkboxes listed in the dialog box.

The okay button is used to confirm your submission on the choice of columns you want to check for duplicates from.
Its however important to note that before performing operations involving deletion of data from your worksheets, always have a copy of your workbook to work as security in case of accidental erasers that may arise when some operations are carried out.
Step 5: A dialog showing how many duplicate entries were deleted and how many remains are displayed. This dialog has a single "OK" button. Click on the "OK" button to close the dialog and resume with normal worksheet operations that you might wish.
