
Excel is a popular Microsoft office suite program used mainly for creating spreadsheets and compiling data. To help you protect your work, excel gives you options by providing security features including securing it with a passcode.
If you are tasked with preparing these files and want to ensure no one else tampers with them, you need to set a strong password on the program such that no unauthorized users can interfere with the content therein. Furthermore, there may arise circumstances that may require access to the file that may necessitate doing away with the password. For instance, when collaborating, or when the creator is unavailable. This post highlights ways you can remove an excel password on your Windows PC or Mac.
Why include a passcode in an Excel file?
A password is one of the many security features at your disposal to prevent work-tampering and unauthorized access. For instance, if you are working on a sensitive project, say a financial audit, then you need to secure it for enhanced protection.
Sometimes you can create a file for sharing on a read-only basis. Such files cannot be left unprotected to maintain the integrity of the content. Hence, you need to apply for password protection. A read-only document can be shared by multiple people over various platforms, but without permission to edit, one cannot change its content.
Method 1: How to remove password protection in Excel manually using the info feature
1. Go to your Microsoft Office Suite and launch the Microsoft Excel program.
2. Open the encrypted Excel spreadsheet file you want to remove the password. In case you have set opening password protection in the file, it means the file is locked. You will be required to enter it. Click OK when done.

3. On the upper left corner of your opened worksheet, click the File tab. Click on 'Info.'

4. Click on 'Protect Workbook' to open a drop-down menu. Then, choose the type of password protection you had set to remove.

- For Encrypt with Password option, all you have to do is clear the password written and click OK to remove the password. It works mostly for Excel from 2019 to 2010.

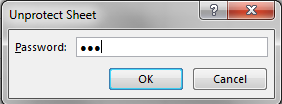
- For the 'Protect Current Sheet' and 'Protect Workbook Structure options,' get an Unprotect Sheet window and enter a password. Click OK to remove the protection. It works for Excel 2007 and older versions.
Note that you can remove password protection from the Review tab and click Protect Sheet or Protect Workbook. Clicking on Unprotect Sheet or Protect Workbook will automatically remove the password from the sheet.

Method 2: How to remove a password in Excel using iSeePassword
iSeePassword Dr.Excel is a powerful third-party tool that can be used to recover Excel open passwords and remove protection passwords from Excel Worksheet. You can unlock the worksheet pretty quickly with this password removal software. When you forgot the Excel password and the above tricks didn’t work, Dr.Excel is the best solution out there to help you get away from an awkward situation.
First, please download iSeePassword Dr.Excel from this link:
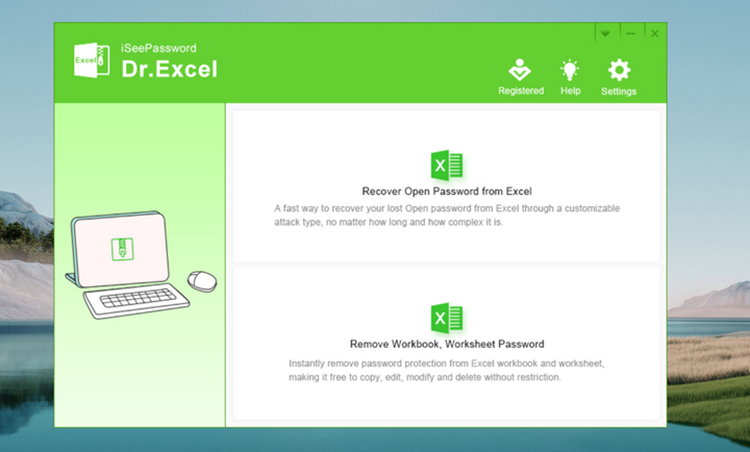
Recover Open Password from Excel
Open Dr.Excel from your computer and click Recover Open Password from the Excel menu on the welcome screen.
Please import the password-protected Excel file from the new window with the Add File button. Next, choose a password attack module. Usually, we will use Brute-force with Mask Attack as it allows you to set a couple of parameters to shorten the password recovery time.
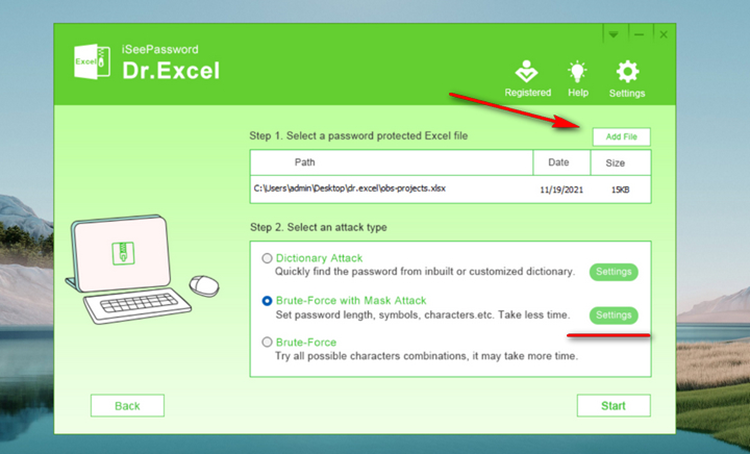
Hit the Settings button on the right side and make proper settings accordingly.
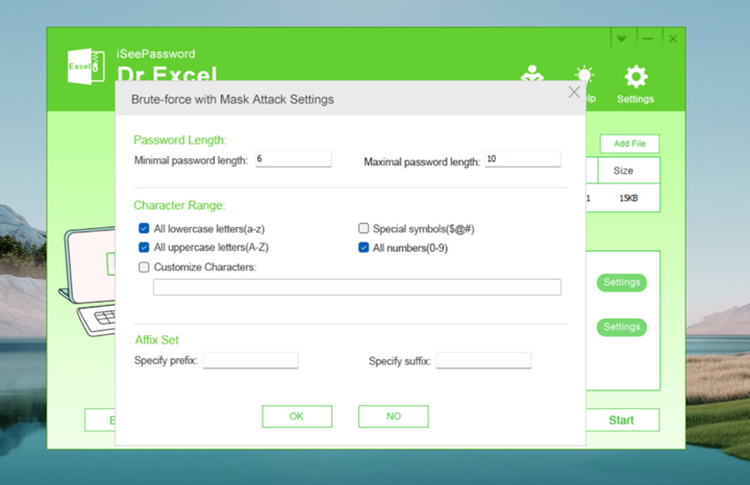
Save the changes, and Dr.Excel starts to recover Excel open password based on your settings. Once the password is found, it will be shown on the screen.
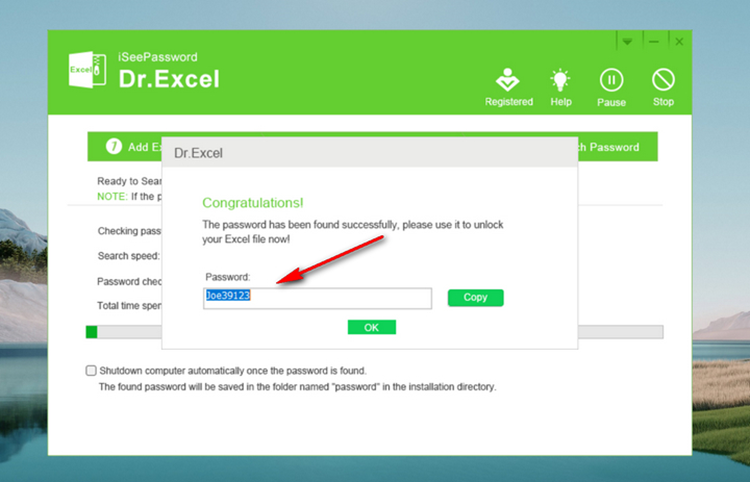
After the password was recovered, you can now remove the password using the methods shared previously in this article.
Remove worksheet protection password from Excel using Dr. Excel
Well, it is much easier to remove the Excel worksheet password with the Dr.Excel app. It is almost done instantly.
First, choose Remove Workbook, Worksheet Password from the main window. Now, locate Add File button in the upper left corner to import the Excel file into the program. Finally, click the Start button to remove the worksheet protection password from Excel. The password will be removed in seconds without waiting, even if it has a complex password.
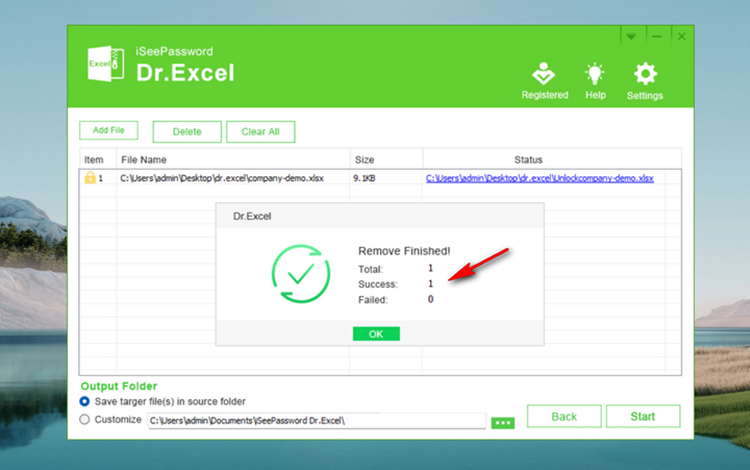
The unlocked Excel file is saved in the same folder as the original one sits. If you try to open the unlocked file, you will find no password attached to it. iSeePassword Dr.Excel is by far the easiest way to remove a password from Excel when you forgot the password.
Method 3: How to remove a password in an Excel sheet using the Home tab
1. Launch the Excel program and open the worksheet. You need to remove the password.
2. On the main ribbon menu, go to the Home tab.
3. Under the Cells group, click Format's drop-down arrow. From the list, select Unprotect Sheet.

4. Type in the password and then click OK to remove the password.
Method 4: Using Save As to remove password protection in Excel
1. Open the password-protected Excel worksheet. After this, go to the File tab and select Save As.

2. Click the drop-down arrow to display a pop-up window. On the window, click Tools, then select General Options from the drop-down menu.

3. In the dialogue box, clear the password to open and modify fields to remove them.
4. Click the OK button to save all changes made. Remember to click the save button to save your modified document.

Method 5: Remove Encryption with Excel VBA
Running a simple VBA code can prove significantly essential in unprotecting all sheets and workbooks in excel.
To remove protection from excel files, you need to open the file, access the basic visual tool, and write a VBA code in the Visual Basic Editor. Follow these steps;
1. Find and click on Developer on the Excel ribbon.

2. Tap on the Visual Basic option

3. In this window, choose to Insert, and on the dropdown, select New Module

4. Input your code in the Visual Code Editor and run it, either by selecting the Run tab or press F5.

Use the following in the process above;
Password argument: worksheet.Unprotect method
Code: i. for a single password;
Sub UnprotectAllSheets()
     For Each wsheet In ActiveWorkbook.Sheets
         wsheet.Unprotect (123456)
      Next wsheet
End Sub
ii. for those secured with different passwords;
Sub UnprotectAllSheets()
    Sheets("January").Unprotect ("password")
    Sheets("February").Unprotect ("password")
    Sheets("March").Unprotect ("password")
    Sheets("April").Unprotect ("password")
End Sub
iii. for all sheets except some specified ones, say a sheet named January.
 Sub UnprotectAllSheets()
     For Each wsheet In ActiveWorkbook.Sheets
      If wsheet.Name = "January" Then
         wsheet.Protect
    Else
         wsheet.Unprotect
    End If
      Next wsheet
End Sub
Copy the codes above and paste them into the Visual Basic Editor for the specific scenarios.
Method 6: Remove Excel Passwords Using Zipping File Tool
The goal here is to do away with password protection. The process, therefore, involves compressing the file into a zip file, a little editing, then converting back to .xlsx format. Below are the steps;
1. Click on View in the Windows File Explorer and tick the box enabling File Name Extension.

2. From the Home tab select the file and select Rename

3. Remove the .xlsx extension from the name only and replace it with .zip. Press Enter
4. Click Yes on the warning popup window.

5. The .xlsx file changes to a .zip file
6. Open the zip file and select the xl folder

7. Click on the worksheets inside the xl folder.

8. Find the XML file

9. Select and right-click on the mouse; from the resulting menu window, choose Copy To

10. On the directory window, enter a directory and click OK
11. Go to the selected directory, select the file, and right-click the mouse. Hover the mouse on Open with from the context menu, then choose Notepad.

12. This will open the file on Notepad.

13. Press Ctrl+F on the keyboard to trigger the Find tool

14. Click Find Next on the window that opens.
15. The location of Protection shall be highlighted.

16. Select the part of the text from <sheetProtection … to scenarios="1"/>

17. Press delete or backspace to wipe the text from the pad.

18. Press Ctrl+S to save the text.
19. Open Windows Explorer and select the original file.
20. Rename this file back to .xlsx from .zip

21. Open the Excel file
22. You can check that there is no protection by trying to edit the file or go to Click Format on the Home tab and confirm there is Protect Sheet from the dropdown menu. If there were a password, there would be Unprotect Sheet.
Method 7: Remove Protection from An Excel File Online
Groupdocs is the online tool used to clear passwords from excel files. It is, however, better suited when the password is known.
Here are the steps;
1. Log onto the Goupdocs

2. Click on the Click or drop your file here handle on the page
3. Select the file you want to unprotect, then hit on Open button

4. After the upload, input your password into the empty field shown

5. Then click UNLOCK
6. Wait until the process is complete, then click Download Now to download the file on your PC

Method 8: Remove Password Using the Review Tab
Follow these steps
1. Tap on the Review

2. Click on Protect subtab, then Protect Sheets.

3. Input your password into the popup window and click OK

4. Your sheet is now unprotected.
Method 9: Remove Password Using Unprotect Sheet Command
Follow the following steps:
1. Open the file, and from the Home tab, go to Cells.

2. Click Format, and on the dropdown menu, tap on Protect Sheet.

3. A box will pop up; input your password and click OK.

Conclusion
The article above provides some methods to remove password protection from your Excel files. The procedures mentioned above are some ways you will end up with the same results. Always remember to save your work again after making any changes to it.