

Excel offers users many built-in features they can use to organize and sort out their data. The Microsoft application gives you the choice of sorting out your data from A to Z or high to low. Despite this, you may want to sort out your data based on your preferred criteria. Excel gives you tools and features to do this. One of these is the ability to create custom lists.
In Excel, custom lists are used to sort out data based on the user's choice. The lists are useful when you need to perform multiple tasks on the same data sheet on a repetitive basis.
Creating custom lists in Excel manually
1. Open your Excel file.
2. Tap on the "File tab" and select options on the drop-down menu to open a dialog box.
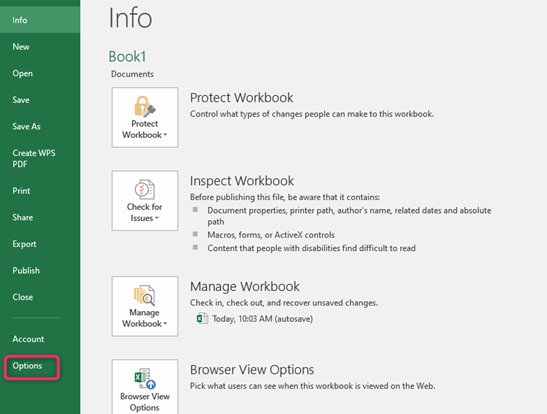
3. In the "Excel Options dialog box," click on 'Advanced.'

4. Go to the 'General' section and click on 'Edit Custom Lists' to display a popup dialog box.

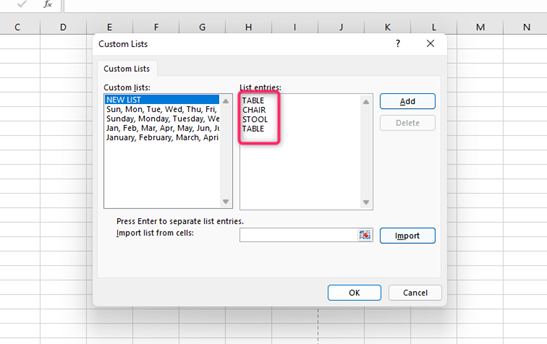
5. In the "Custom Lists dialog box, "tap on 'NEW LIST,' then click on the 'Add' button.

6. On the List Entries box, write your preferred details. Press the Enter button after writing each entry.
7. Click OK after writing all your details. It will close the Custom Lists dialog box and return you to the Excel Options dialog window.
8. Click on the 'OK' option to close the window.
9. Go to your Excel file. Type in the first name only from your entry list in an empty cell.
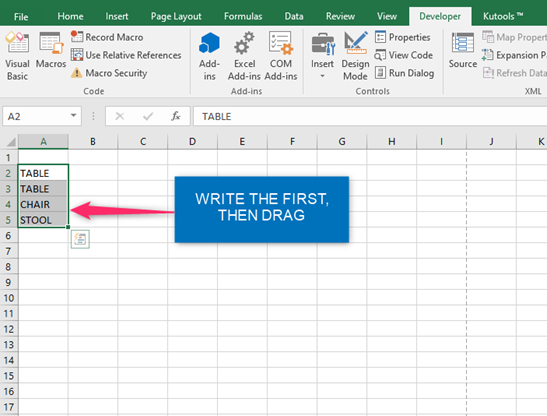
10. Drag your cursor down from the cell to autofill the other cells.
You will notice details from your custom lists are automatically updated without you having to manually type in each detail in every cell of your Excel file.
Note;
- You do not need to create a custom list for days of the week or months of the year as the lists already exist in Excel.
- Your custom list can be applied either horizontally or vertically.
- Your manually created custom lists will always be visible in Excel's custom lists until you delete them.
- To make a "custom list" in Excel 2007, follow these steps. First, click on the Microsoft Office Button > Excel Options > Popular > Top options for working with Excel > Edit Custom Lists.
Creating custom lists by importing cells from a worksheet1
You can create your custom list by importing it from cells in one of your worksheets. Here is what to do;
1. Enter the values you want to sort to appear in a range of cells (either vertical or horizontal).
2. Select the range of cells you have typed.

3. Follow the above steps for displaying the Edit Custom Lists popup window in Excel.
4. In the Custom Lists popup dialog box, check if the "cell reference" of the list of items you have selected appears in the Import list from the cells field.
5. Click 'Import.' The items in your selected cell range will appear in the Custom Lists panel.

6. Click the 'OK' button twice.