
Consistent formatting when using spreadsheet programs helps organize work and helps to come up with a good, if not excellent, job. Locking up the width of a column or height of a row in a spreadsheet reduces or limits changes to the format. It also allows one to work on a project with other users while securing the original formatting. The following are steps to lock width and height in excel:
Set the width and height
To set a column width, follow these steps:
1. Click on one or more columns

2. Go to the cells section of the Home tab
3. Select the format button

4. Click on 'Cell size.'
5. Click on 'column width.'

6. Then type how wide you want the column to be, then click ok
To set row height:
1. Click on the rows you want to adjust

2. Go to cells group in the home tab
3. Click on the Format button

4. Select 'cell size.'
5. Click' row height.'

6. Type how tall you want the row to be
7. Click Ok
Note
Setting "height and width" of each column and row helps in preventing the size of the cells from changing automatically if you add content
1. Check on individual cells
After setting conditions for each row and column, try entering some content into your cells to ensure they are the correct size.
2. Select the range to lock
For Excel to lock the width and height of the spreadsheet, you first have to choose the "range of cells" you need to secure. To select the range to lock;
- Click on the top left corner of the section you want to lock
- Then drag to the bottom right corner of the section. Select a single column, click the top column to select all cells in that column, or you can choose all the cells in a single row by clicking the number to the left of the row.

Alternatively,
You can select the range of cells to lock by using the shift key as follows.
- Click on a cell in one corner.
- Hold down the "shift key" and tap a cell in the diagonal corner of the range you need to select.
Note
To lock sections in various parts of a spreadsheet, you must complete the locking process several times.
Adjust protection formatting
After choosing the area, you want to lock, change the protection formatting as follows:
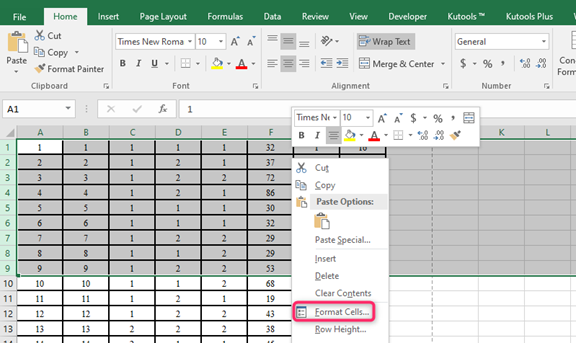
1. Right-click on the area you selected, then click on Format cells
2. Select the protection tab, then deselect the locked check box. It will enable other people to continue to edit the content in the spreadsheet cells while keeping the width and height locked.

3. Click ok after the box is unchecked
Add a password
1. Go to the toolbar at the top of the program
2. Then go to the review button and click 'protect sheet ' in the far right section

3. A pop-up shows where you can input a password to protect the excel sheet. Enter a password of choice and click on the check box saying 'protect worksheet and contents of locked cells

Note:
After setting a password, you or another user to edit the width or height of the cells you selected will have to type the password.
You can also select extra permissions for what users who don't have passwords can do on the spreadsheet.